
Interface Tour
Here's a quick overview of everything you see when you open a document in DocuShark.
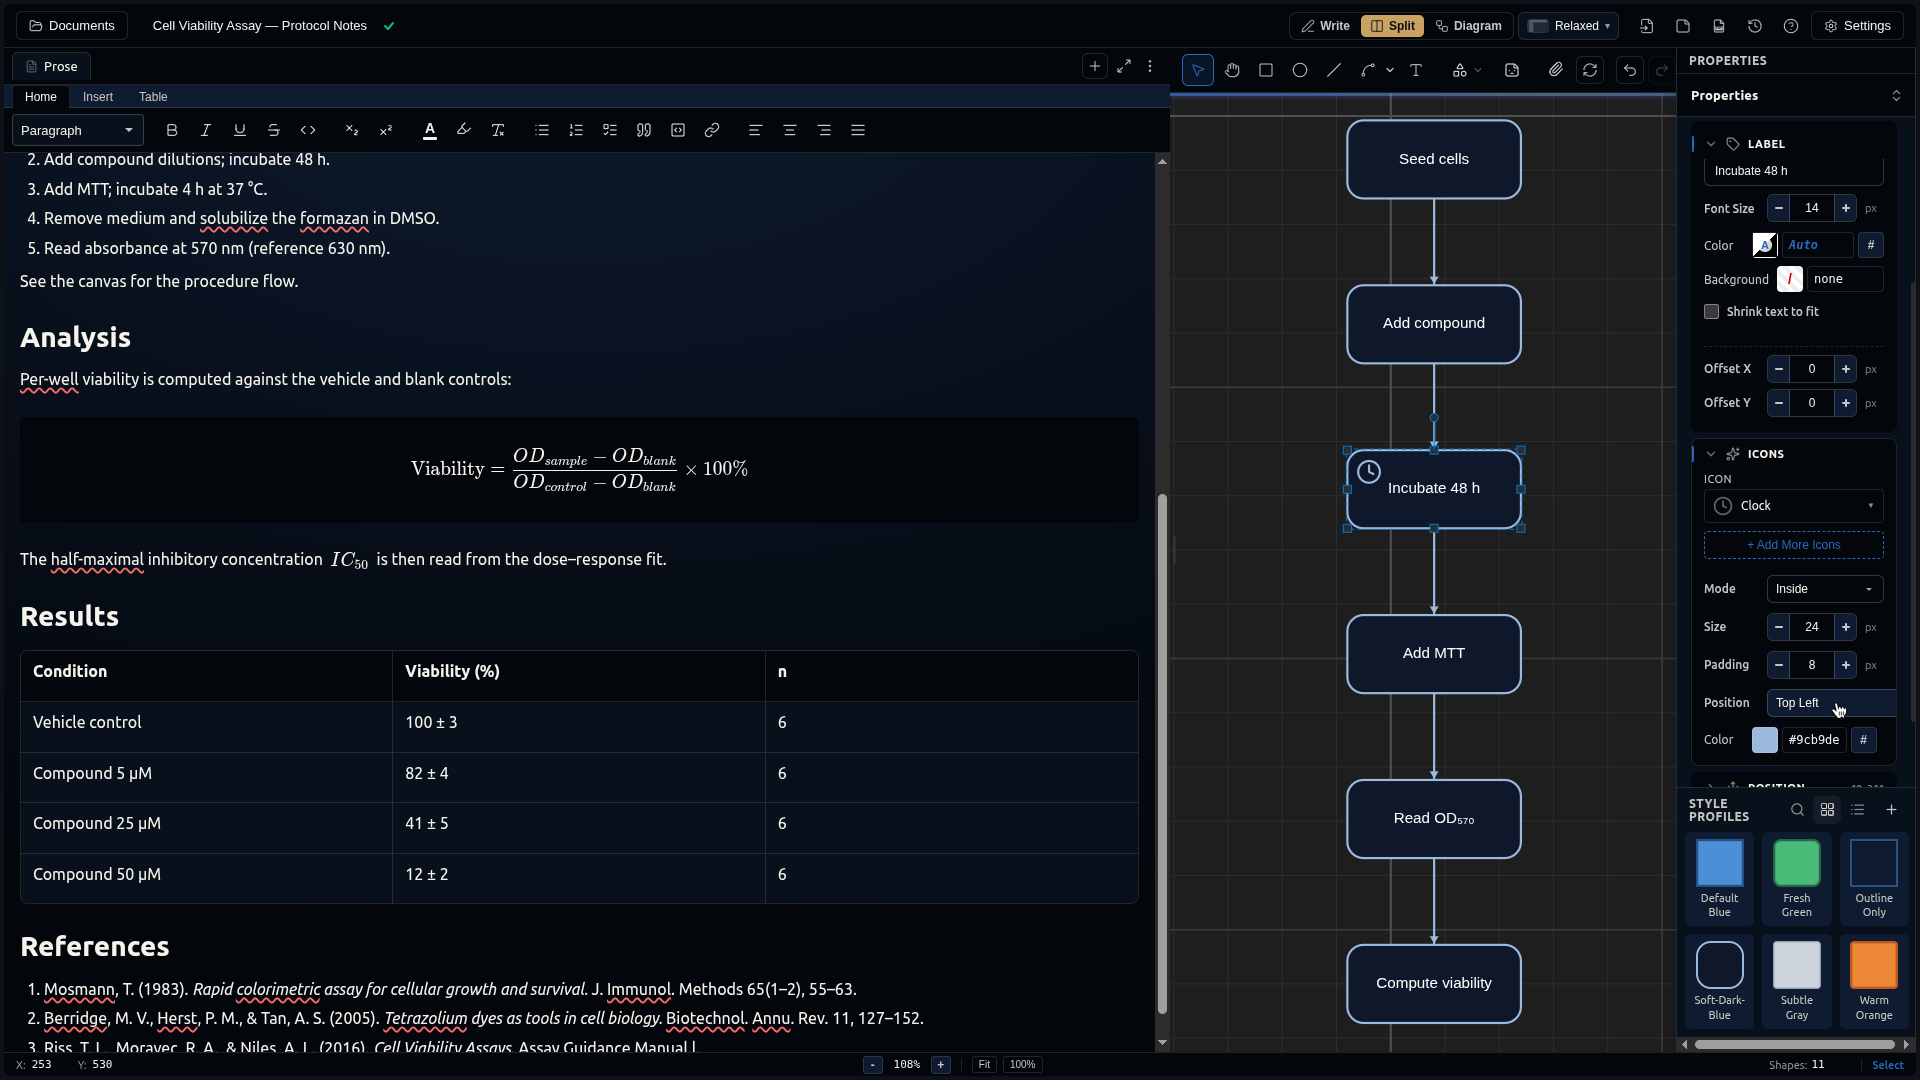
Follow along with the real document
This is a real example — download it as a .docushark and import it to click around as you read, or browse the Example Gallery.
Layout Overview
The Toolbar
The toolbar runs across the top of the screen. From left to right:
- Tool buttons — Select, Rectangle, Ellipse, Line, Connector, Text, Hand, and more
- File import — Embed files (PDFs, images, spreadsheets) onto your canvas
- Page tabs — Switch between pages in your document, or create new ones
- Layout selector — Switch the workspace between writing, diagramming, or a split view (see Layout Modes)
- Whiteboard — Open the sticky-note brainstorming overlay (
Ctrl+I) - Settings — App configuration, document management, collaboration
The Canvas
The large central area is your infinite drawing surface. This is where your diagram lives.
- Pan by middle-clicking and dragging, or by holding Space and dragging
- Zoom with the scroll wheel — it zooms toward your cursor
- Navigate with WASD keys (like a game) or arrow keys
- The grid helps you align shapes — toggle it in Settings
Document Editor
The left panel is a full rich text editor powered by Tiptap. Use it to write documentation alongside your diagrams.
- Supports headings, lists, tables, images, LaTeX math, code blocks, citations, and fields
- Each page has its own text content
- Toggle it by clicking the Document tab
TIP
The Document Editor's position and size depend on your active layout mode — it takes center stage in Relaxed and tucks away in Designer. See Layout Modes.
Property Panel
The right-side panel shows properties for whatever you have selected:
- Position & size — X, Y, width, height, rotation
- Fill & stroke — Colors, opacity, border style
- Text — Font, size, alignment, color
- Shape-specific settings — Corner radius, arrow styles, connector routing, etc.
When nothing is selected, the panel is empty.
Layer Panel
Also on the right side (toggle between Property and Layer panels):
- Shows all shapes in your document in stacking order
- Drag shapes to reorder them (front to back)
- Click a shape name to select it on the canvas
- Groups show as expandable trees
Status Bar
The bottom bar shows you:
- Mouse coordinates in world space
- Zoom level (click to reset)
- Shape count for the current page
- Active tool name
- Connection status when collaborating (🟢 Connected, 🟡 Reconnecting, 🔴 Offline)
On a small screen or a touch device the bar reduces to what still applies there: the zoom controls whenever a canvas is on screen, plus connection status. Mouse coordinates, shape count and the tool name are left out — the first has no meaning without a hovering pointer, and the others cost more width than they earn. When you're writing with no canvas in view and there's nothing to report, the bar steps aside entirely and returns the space to the page.
Keyboard Quick Reference
These are the shortcuts you'll use most often:
| Action | Key |
|---|---|
| Select tool | V |
| Rectangle | R |
| Ellipse | O |
| Connector | C |
| Text | T |
| Hand (pan) | H |
| Undo / Redo | Ctrl+Z / Ctrl+Shift+Z |
| Command Palette | Ctrl+K |
See the full list in Keyboard Shortcuts.
Next Steps
Now that you know the layout, explore the features:
- Canvas & Navigation — Pan, zoom, WASD, minimap, grid, and snapping
- Drawing Tools — All the tools and shape manipulation
- Shape Libraries — Flowchart, UML, ERD, cloud icons, and custom libraries